10-Minute Guide to Set up Test Automation using Selenium WebDriver with Ruby
Set up your computer to run Selenium WebDriver tests in Chrome

In my one-day Selenium training, I suggest that the attendants use the TestWise Ruby edition, which bundles a Ruby (Windows) distribution. I want the attendants (most of them are new to test automation) to run/write a Selenium test as quickly as possible, in minutes (a quick start guide using TestWise Ruby edition, recommended for people who haven’t used Ruby before)
This guide is for setting up test execution so that you may use the standard TestWise edition (for all platforms). The installer for TestWise standard edition (Windows) is a lot smaller, only 6MB.
Tip: Beginners using Windows platform, make sure you start with TestWise Ruby edition and can run a sample RSpec test first, before proceeding.If you have installed the TestWise Ruby edition before, uninstall it. TestWise IDE is independent of the test execution environment. In other words, it will use Ruby (or Python or Nodejs) on your machine. This gives users maximum flexibility. TestWise is just a test automation tool, testers should not depend on it. I am saying this as the creator of TestWise and a professional test automation engineer.
Getting started with TestWise Ruby edition (on Windows) is super quick and easy. However, I emphasize that it is important to set up an automated test execution environment where you can run tests from the command line with no vendor locking.
In this article, I will show you how to set up your machine to run raw Selenium WebDriver (Ruby) tests quickly, with 100% free open-source software.
Table of Contents  ∘ 1. Install Ruby (~2 mins)
  ∘ 2. Install Essential Gems (~1 to 6 mins)
  ∘ 3. Install Testing Gems (~1 min)
  ∘ 4. Install ChromeDriver (~ 1 minute)
  ∘ 5. Verify Test Execution
  ∘ Next Steps
1. Install Ruby (~2 mins)
Ruby is a popular scripting language and pre-installed in macOS and some Linux distributions. In my opinion, Ruby is the best scripting language for test automation. Here I will cover Ruby installation for Windows, which requires more effort than that for Mac/Linux.
Info: GitHub, AirBNB and many other well-known web sites are written in Ruby.
Download RubyInstaller for Windows with Devkit, such as ‘Ruby+Devkit 3.2.2–1 (x64)’, and run the installer. (any 3.2 version is fine)
Note: There is currently an issue with a dependable library when using Ruby v3.3 on Windows. Therefore, we recommend using Ruby 3.2. Unlike Java or Node.js, Ruby’s versioning is well-managed, so you likely won’t need to upgrade from Ruby 3.2 for over five years.
Double-click the downloaded package (about 130MB in size) and run the installer.

Click the “Install” button. On the next page, make sure “MSYS2 development
Important! Make sure the DevKit is selected (see the screenshots below) in the installation process. The DevKit is required for compiling certain libraries (called Gem in Ruby). You can also find a tutorial video (45s) here.

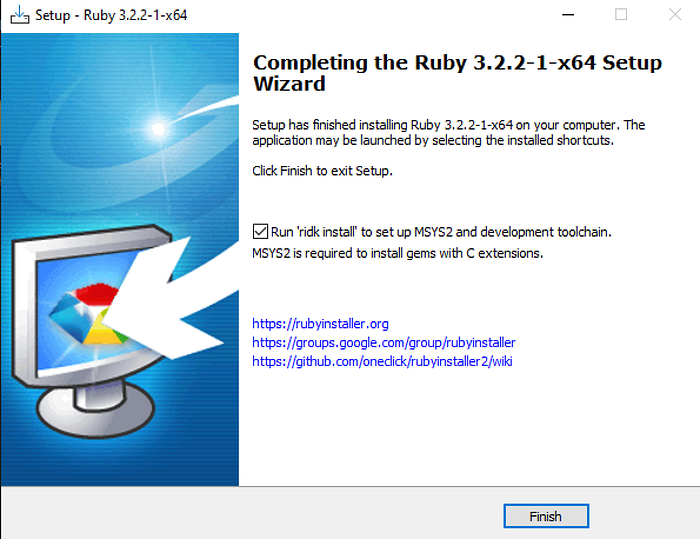
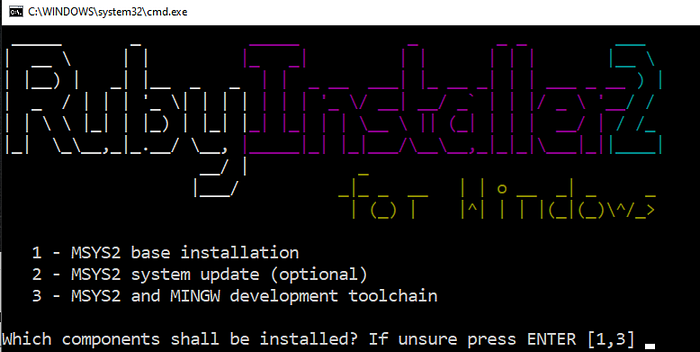
Just press the “ENTER” key. Wait a bit.
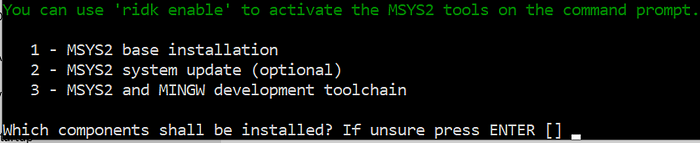
Press the ENTER key. The installation will take a while, about 2–3 minutes. (you may perform Step 4 and a part of Step 5 during the wait)
Done! By default, it is installed under the folder c:\Ruby32-x64 .
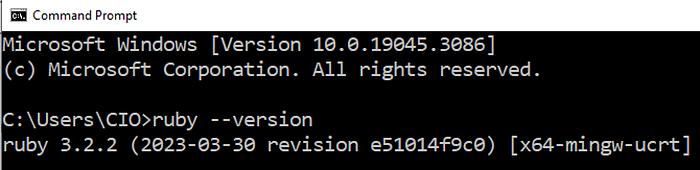
Verify the installation, and run the command in a Command Window.
ruby -vThe output will be like this:
Step 2–5 are the same for all platforms: Windows, macOS and Linux.
2. Install Essential Gems (~1 to 6 mins)
The libraries in Ruby are called ‘gems’. Installing a gem is easy. Run the below command in a new command window:
gem install bundler --no-document
This installs thebundler gem, a common Ruby gem to manage dependencies of the application’s gems. We might not need to use it yet, but will need it for setting up Continuous Testing. --no-document is optional: to save time by skipping installation documentation.
If you encounter some issues (Windows only) later, try running the commands below:
gem install ffi --platform=ruby --no-documentThis gem must be compiled (using DevKit) to work on your machine. This will take about 5 minutes. You can install ChromeDriver (step 4) while waiting for this to complete.
3. Install Testing Gems (~1 min)
Now, install the gems for test automation. Firstly, the best automation framework: Selenium WebDriver.
gem install --no-document selenium-webdriverThe current stable Selenium version is 4.22.0. If you want a specific version, supply the version number below:
gem install --no-document selenium-webdriver --version 4.22.0Then the best test syntax framework: RSpec. (Note: RSpec is the first and most popular BDD framework. It is far better than Cucumber. As a comparison, RSpec v3.8 download count: 196,569,068; Cucumber v5.3 (highest) download count: 554,695).
gem install --no-document rspecWe can install multiple Gems in one go. The commands below will help install some common helper libraries.
> gem install --no-document activesupport fakerExamples of using the above two in test scripts:
5.days.ago               # ActiveSupport provides easier syntax
Faker::Internet.email    # Faker generates test data
4. Install ChromeDriver (~ 1 minute)
Update: with new Selenium WebDriver (4.11+) and Chrome (v115+), this step might not be necessary. Check out the article: “Chrome for Testing” for Selenium v4.11+ and Chrome v115+
Anyway, the below section is helpful when you see chromedriver related issues.
To run Selenium WebDriver tests against the Chrome browser besides the Chrome browser itself, you need to install ChromeDriver. Download and put it into a folder in your PATH, e.g.C:\Ruby32-x64\bin .
To verify the installation, open a command window (terminal for Unix/Mac), execute the command chromedriver --version. You shall see output like the below:ChromeDriver 92.0.4515.43
You can find a tutorial video (42s) here.
Please note that the version of ChromeDriver shall match your Chrome browser’s version. ChromeDriver works with its version and version+1 Chrome browsers. For example, ChromeDriver v91 will work fine with Chrome v91 and v92, but not v93 with the following text in the test output:
The version of ChromeDriver only supports Chrome version 91
Current browser version is 93
So test automation engineers must add “chromedriver update” as a regular (about every 2 or 3 months) task.
5. Verify Test Execution
Run the commands below to get a set of sample Selenium WebDriver tests. Please read “10-Minute Guide to Git Version Control for Testers” if you are unfamiliar with Git.
> cd c:\demo
> git clone https://github.com/testwisely/agiletravel-ui-tests.git
Now run a sample RSpec test.
> cd C:\demo\agiletravel-ui-tests\selenium-webdriver-rspec
> rspec spec\login_spec.rb
You will see the test execution in a Chrome browser. The output in the command window:

Next Steps
- Learn and Practice more
Put your thoughts on creating your work test scripts. You just started Selenium + RSpec with TestWise, probably under 30 minutes. Do spend some time learning.
- My eBook: “Practical Web Test Automation with Selenium WebDriver”
- Selenium Training Workbook, highly recommended
- Case studies (by Courtney Zhan, my daughter) - Set up BuildWise Continuous Testing Server
Testing IDE is for developing/refining/debugging individual test scripts. To run a suite of tests, you shall do it in a Continuous Testing server, such as BuildWise. BuildWise Server and BuildWise Agents (for parallel execution) require the setup of test execution(like you just did).
Check out this article: “Set Up a Continuous Testing Server to Run Selenium Tests in Minutes”.